Fundamentals of Azure Exercise Answers
For this exercise you will need:
- Azure Tenant
- Azure Active Directory
- P2 Azure Active Directory License (or Microsoft Entra)
Objectives
- Create a user in Azure Active Directory
- Update the user’s information
- Create a dynamic group
- Create and test a conditional access policy
How to create a user in Azure Active Directory (AAD)
The first step is to navigate to your Azure Portal to your Azure Active Directory. Click here to access the User tab of AAD.
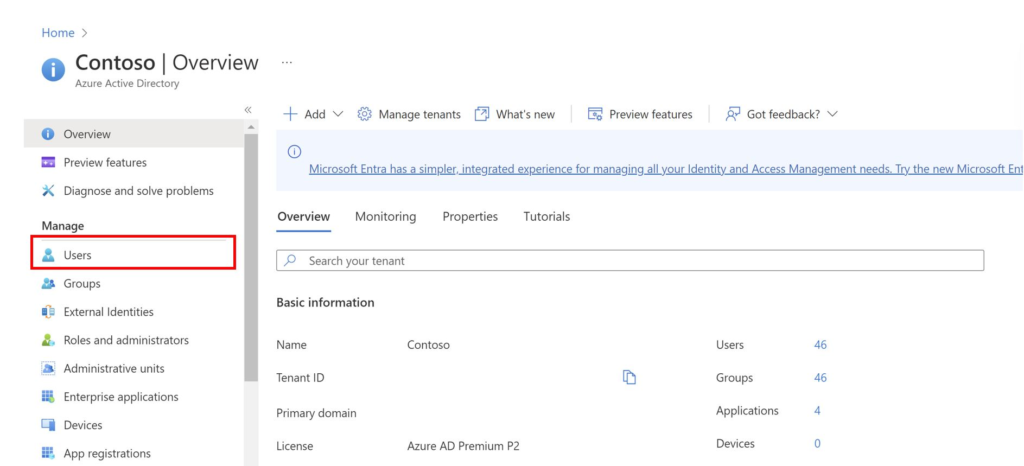
After this click on the New user on the top bar and fill-out the required information.

How to Add the User’s City
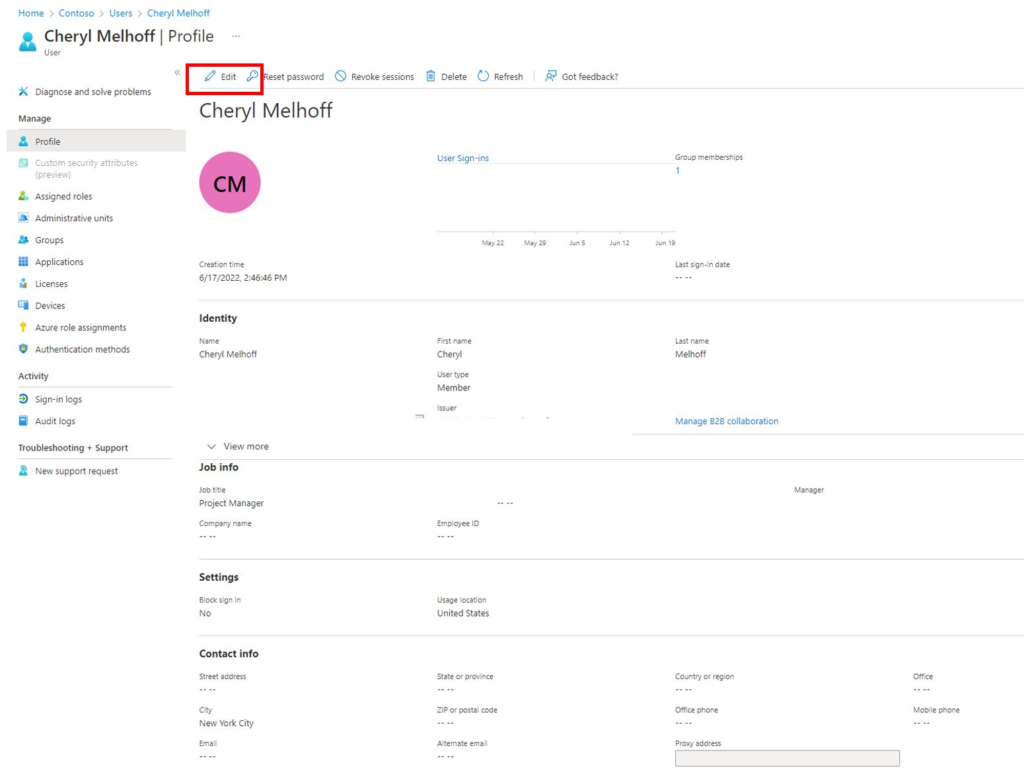
To add a user’s city or edit their information. Go back to your user page, find the user you plan on editing and click on edit. After editing the user information click on save. It should now save the updated information.
How to Create a Dynamic Group in Azure Active Directory (AAD)
Navigate back to the AAD homepage reach the Group Tab.
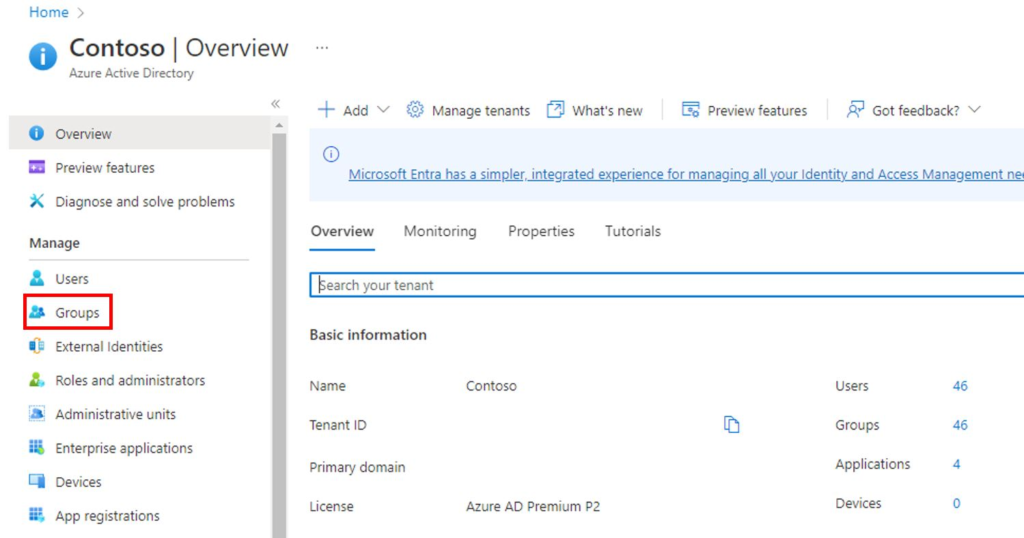
After navigating to the group page, click on New Group on the tabs on the top.

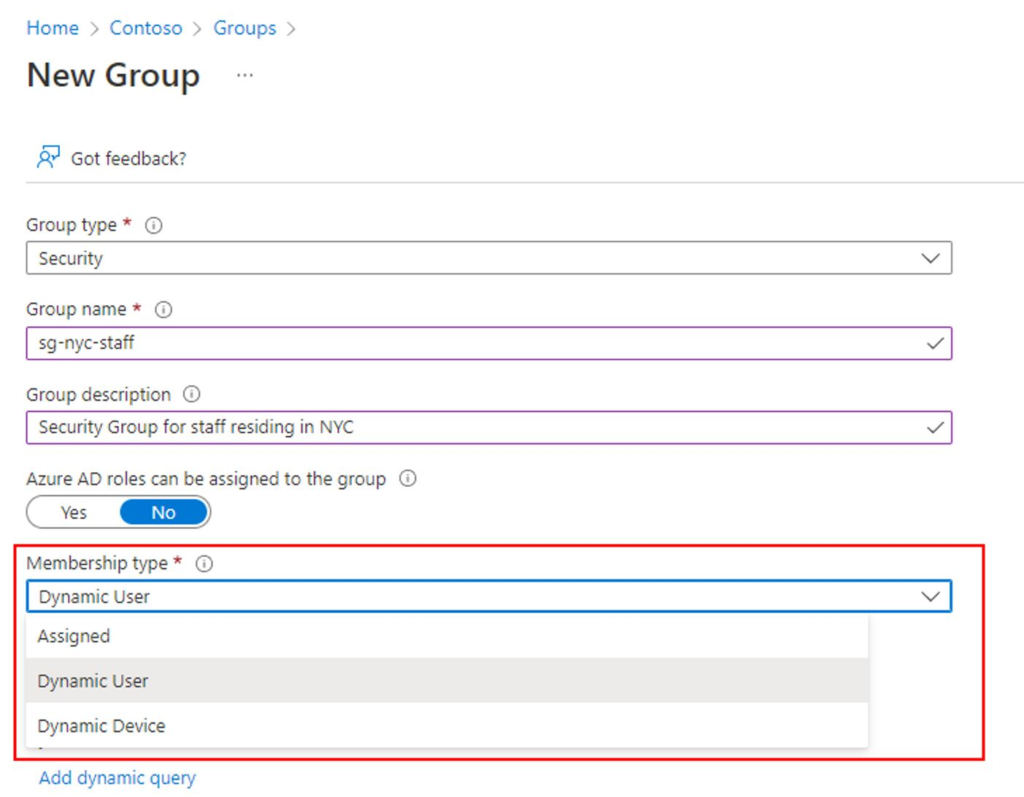
Fill in the information regarding your security group in the boxes. Make sure to change the membership type to: Dynamic User.
Next click on Edit dynamic query
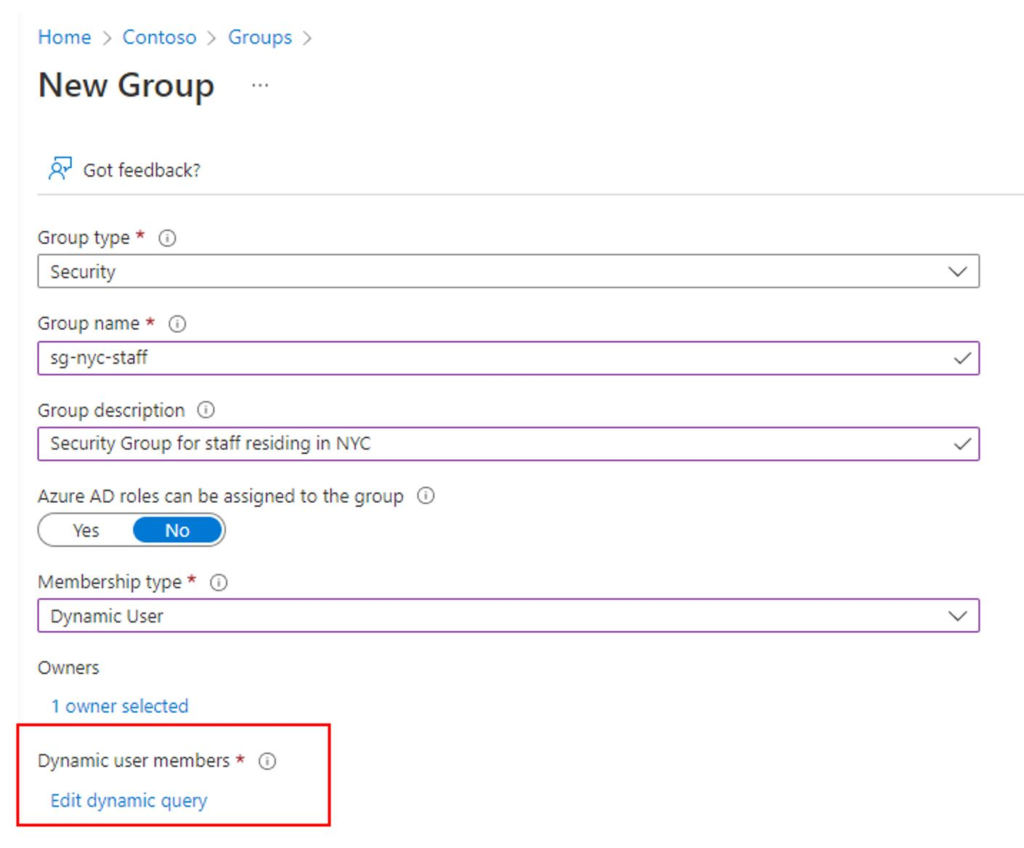
Create the rule by using the drop down to click the properties that you would like to apply to the dynamic security group.

Hit Save and navigate back to the previous page and click on Create.
After a few minutes, you should see your newly created user in this Dynamic Security Group.

How to Create and Test a Conditional Access Policy
In the search bar look up Azure AD Conditional Access. It should appear before you even finish typing out the words.

Once we get to the conditional access page, navigate to the Named Locations tab.

On the top bar select Countries Location. Look up the United States in the search countries bar.


After that click create and navigate to the policy tab on the left-hand bar and click on New Policy.

Make sure you select Create New Policy and not Create New Policy from Templates After creating a name for the policy, select the scope of policy.
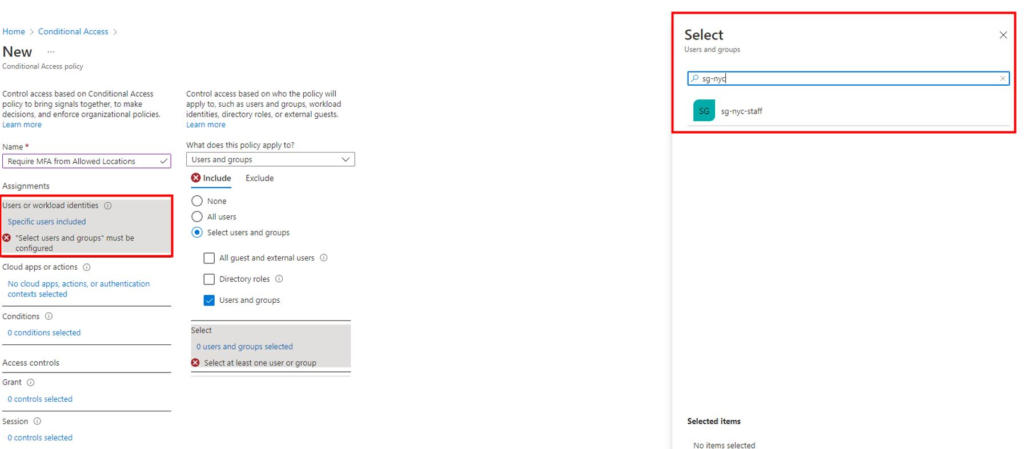
Next select the scope of the applications the policy will apply to.
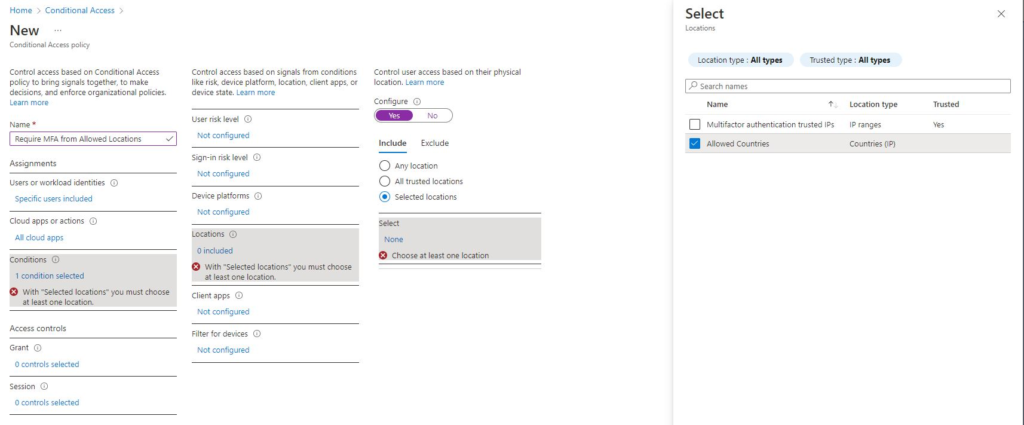
After selecting the applications, select the conditions of the conditional access policy.
Next select the Grant Access Section and select Grant Access + Require MFA
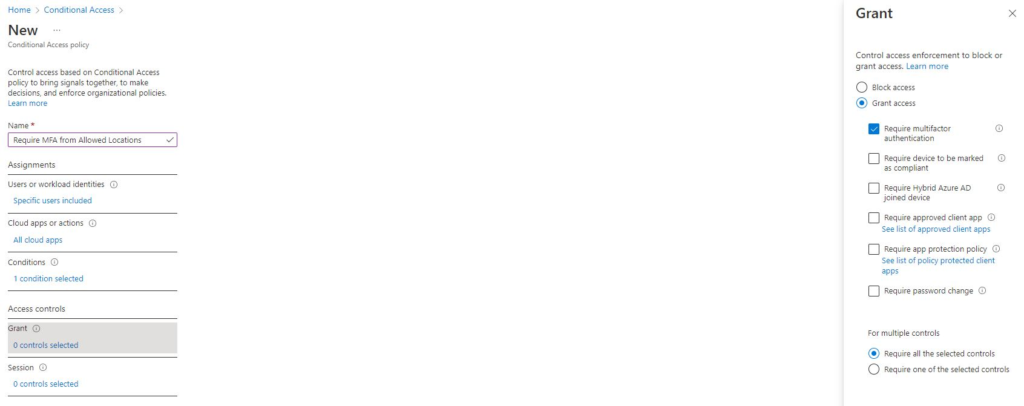
Click on create and you have now created a policy! Make sure you keep on report-only so you don’t accidentally impact yourself.
How to Test a Conditional Access Policy Using “What-if”
Navigate to back to the policies tab and select “What if”

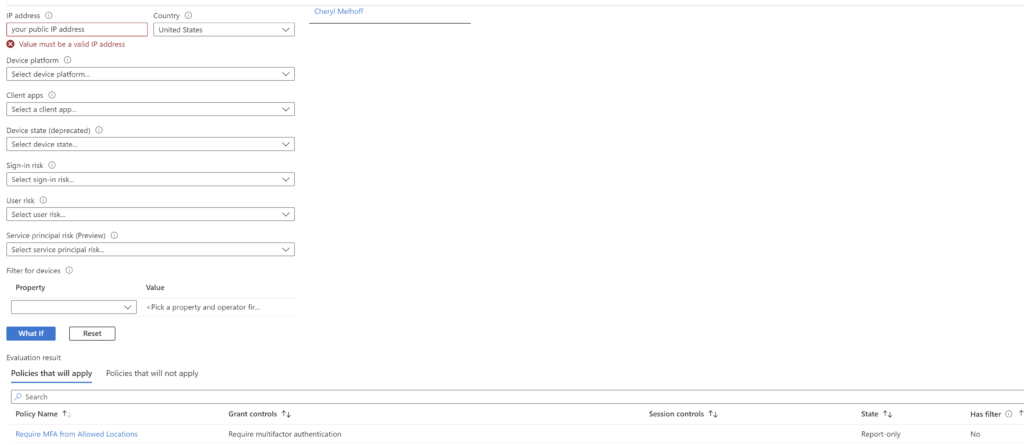
Next select select Cheryl Melhoff as the user we want to test.

After selecting the user, enter your public IP address and select the location as the United States and hit “What If”
You should see the policies that will or will not apply to this user in this scenario at the bottom.
